The app is only as good as what's feeding it. Here's the short list of what to buy — a Pi, one or more SDR dongles, the right antenna, and a filter or two — and how it all chains together.
The signal chain
Antenna in, audio out
Each stage matters — but spend on the antenna first. Everything downstream can only preserve what the antenna delivers.
01 · CAPTURE
Antenna + filter
A resonant antenna for your band, and a filter to keep strong out-of-band signals from swamping the receiver.
Band-specific antenna
Band-pass / notch filter
Optional LNA at the antenna
coax
02 · DIGITIZE
SDR dongle(s)
One or more software-defined radios turn RF into I/Q samples over USB — one dongle per simultaneous decoder.
RTL-SDR / SDRplay / AirSpy
Upconverter for HF (or native-HF SDR)
Powered USB hub
USB
03 · DECODE
Raspberry Pi
The edge box runs every decoder and streams the results and audio to your phone — on your network or from anywhere.
Raspberry Pi 4 or 5
Quality power supply + SD card
Always-on, headless
The brain
A Raspberry Pi 4 or 5
The whole edge stack runs on a single-board computer that sips power and never sleeps. A Pi 5 has headroom for many decoders and the wideband channelizer at once; a Pi 4 is plenty to start.
Pi 5 (4–8 GB) recommended— runs the full decoder set and the band scanner comfortably.
A good power supply— the official USB-C PSU; undervoltage is the #1 cause of "flaky" dongles.
Fast SD card or SSD— 32 GB+; an SSD is nice for long-running captures.
Wired or Wi-Fi— reach it on your LAN, or expose a secure link to listen from the road.
Photo
The assembled Pi + donglesDrop a hardware photo here
The receivers
SDR dongles it supports
Start with one RTL-SDR. Add more — or a wider, more sensitive SDR — as you run more decoders at once. Give each dongle a job.
Receiver
Coverage
Best for
Driver & picks
RTL-SDRRTL2832U
~24 MHz – 1.7 GHzHF via V3/V4 direct sampling
ADS-B, VHF/UHF and the air band — buy this first
Native driverRTL-SDR Blog V3/V4, Nooelec NESDR
SDRplay RSP
1 kHz – 2 GHz14-bit
The whole HF spectrum natively, plus VHF/UHF and strong-signal handling
SoapySDRRSP1B / RSPdx
AirSpy
24 MHz – 1.8 GHz
Weak VHF/UHF work, the air band and satellites
SoapySDRR2 / Mini
HackRF One
1 MHz – 6 GHz
Very wideband receive experiments
Pair with filteringlower dynamic range
Upconverteradd-on
Shifts 0–30 MHz up into range
Gives a plain RTL-SDR the HF bands
Ham-It-Up / SpyVerter
Each dongle serves one decoder at a time, so a stick for ADS-B, one for the air band and one for HF all run at once — the Pi hot-plugs and self-heals them. RTL-SDR runs on the native driver; SDRplay, AirSpy and HackRF are driven through SoapySDR. Bias-tee models (e.g. RTL-SDR V3/V4, Nooelec SMArTee) can power a mast-mounted LNA.
The biggest upgrade
Antennas, band by band
No dongle or filter recovers signal a poor antenna never captured. Match the antenna to the band you care about, mount it as high and clear as you can, and use good coax.
ADS-B (1090 MHz)— a tuned 1090 collinear or a simple quarter-wave; keep the coax short.
VHF/UHF scanning— a discone for wideband, or a tuned 2 m/70 cm ground-plane for the ham bands.
HF (shortwave & ham)— a long-wire, dipole, or a magnetic loop for a small/quiet space.
Marine / air band— a VHF marine whip or an air-band vertical for those slices.
Diagram
Antenna & mounting guideDrop a diagram or photo here
Front-end
Filters & LNAs keep the noise out
RTL dongles overload easily near strong FM-broadcast and cellular transmitters. A cheap filter often does more than a better dongle.
1090 MHz SAW filter— a must for clean ADS-B in a busy RF environment.
FM broadcast reject / notch— stops the 88–108 MHz wall from desensitizing VHF/UHF.
Band-pass for HF— tame strong broadcasters when working the low bands.
LNA at the antenna— only after filtering; a bias-tee dongle can power it up the coax.
Diagram
Filter placement in the chainDrop a diagram here
Optional · Tune by hand
Add a wireless tuning knob
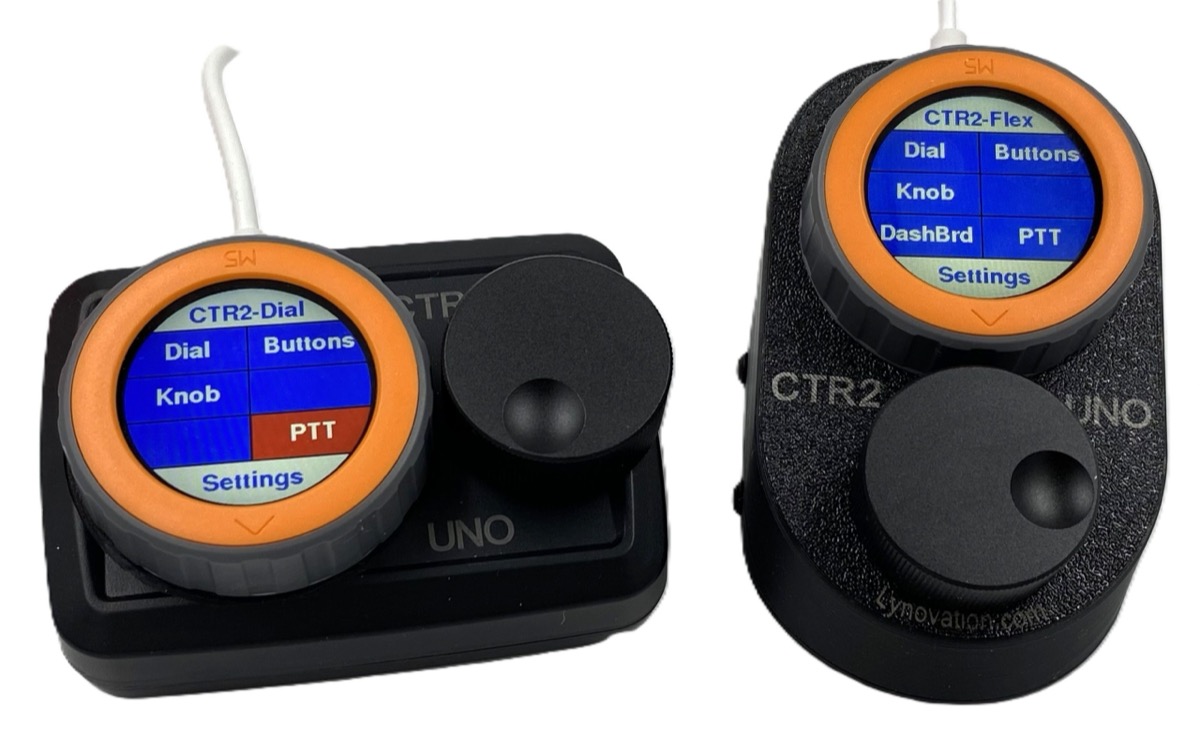
Pair a Bluetooth-LE MIDI controller and tune the radio with a real weighted knob instead of the on-screen dial. The app speaks standard BLE-MIDI, so a controller like Lynovation's CTR2 family works over the air — and any other Bluetooth-MIDI knob binds with MIDI-learn.
Pairs over Bluetooth— Settings → Tuning knob → add the controller; no cables, no extra dongle.
Speed-sensitive— a slow turn nudges one step, a fast spin jumps across the band, like a rig's VFO knob.
Buttons you assign— map the controller's buttons to step size, mode or nudging, with MIDI-learn for any knob.
A Lynovation CTR2 controller — a Bluetooth-MIDI touchscreen and tuning knob. Photo: Lynovation.
Use a powered USB hub — it's about signal, not power
Plug the dongles into a good powered USB hub rather than straight into the Pi. It isolates them, keeps the Pi's own rail clean, and cuts the intermittent USB dropouts that read as "the dongle died." Short, quality coax and a little spacing between sticks help too.
Ready to build
Start with a Pi and one RTL-SDR
That's a complete scanner. Add antennas, a filter, and more dongles as you grow into the bands you care about — the app finds and uses whatever you plug in.